Using HPING3`

Filed in Uncategorized
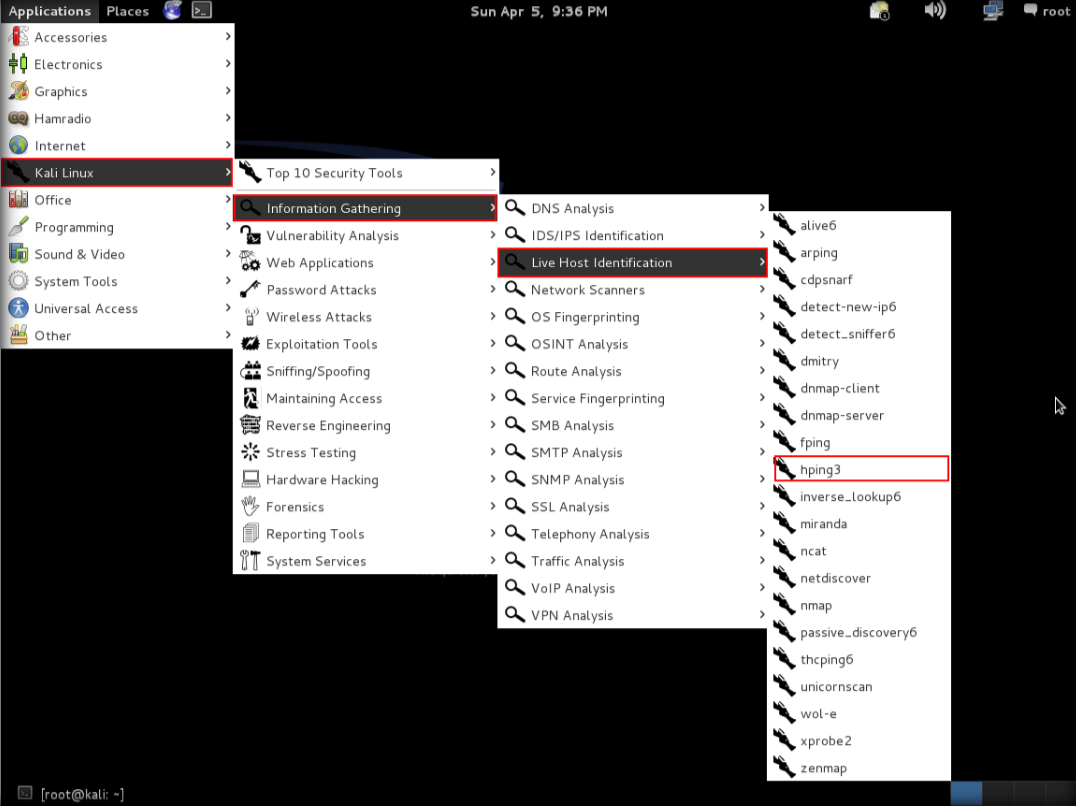
  1. Launch Hping3 from command terminal by typing hping3 and press enter or through application.

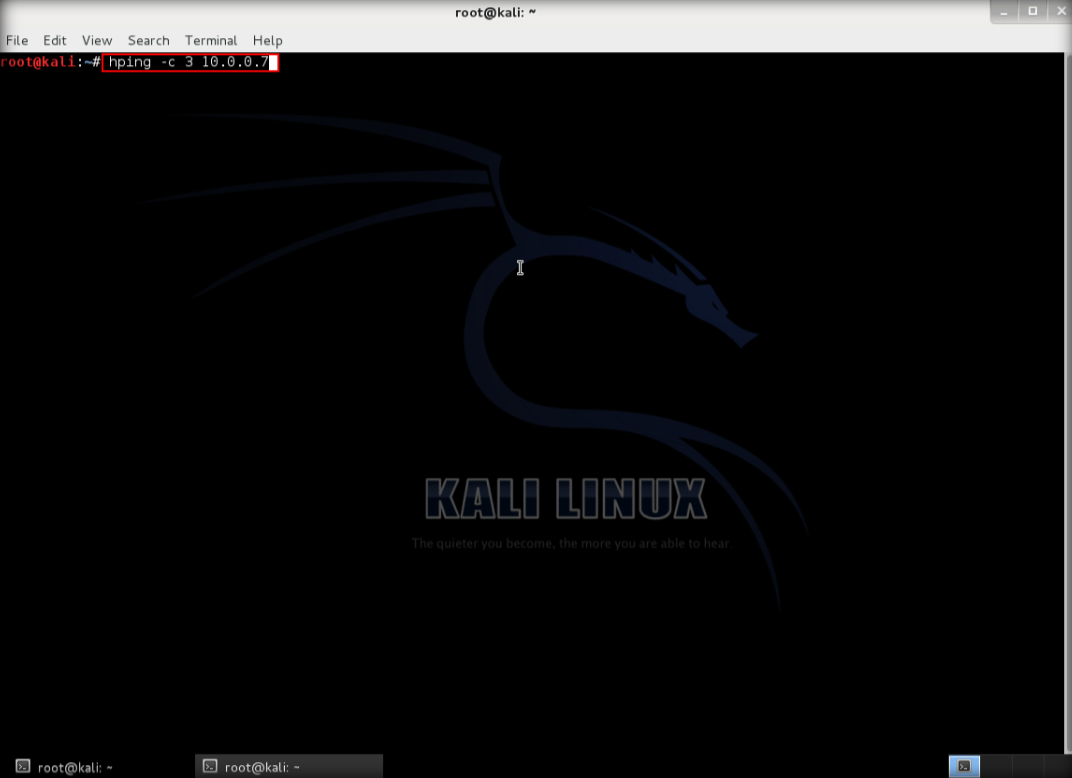
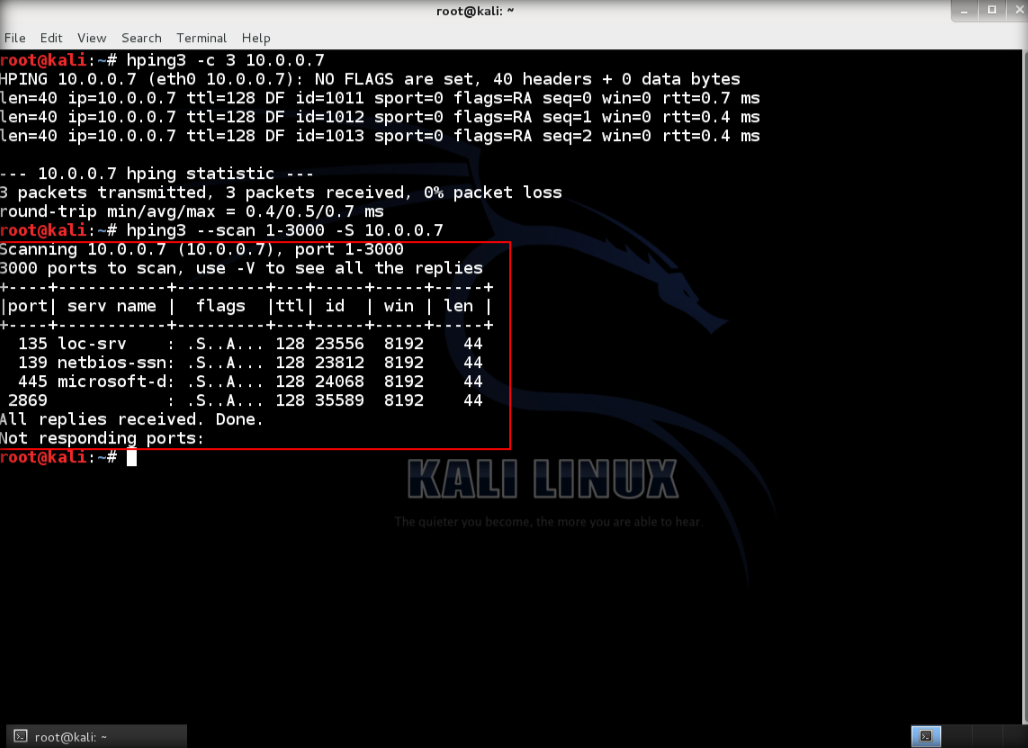
2. After hping3 shows up in the terminal, type hping3 -c 3 <IP address of target machine> then press enter

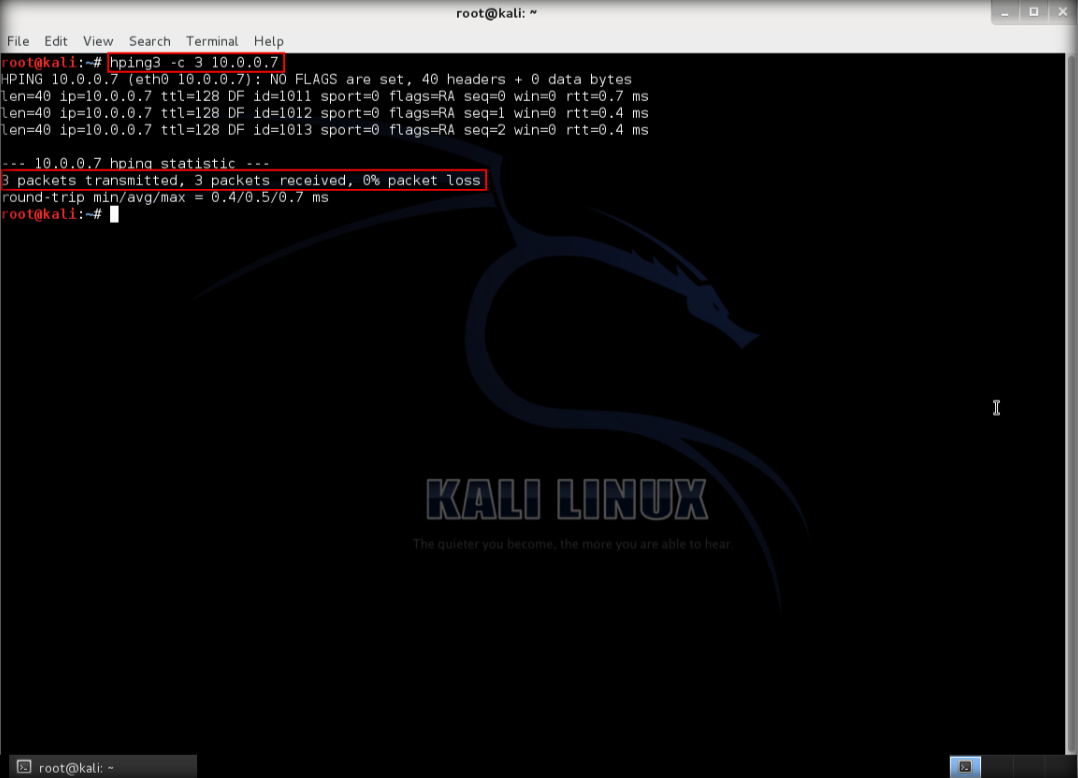
3. After that command, the output will indicate that the packets was received  and sent

4. Next, type hping3 –scan 1-3000 -S <IP address of target> where –scan defines the port range to scan and -S shows the SYN flag

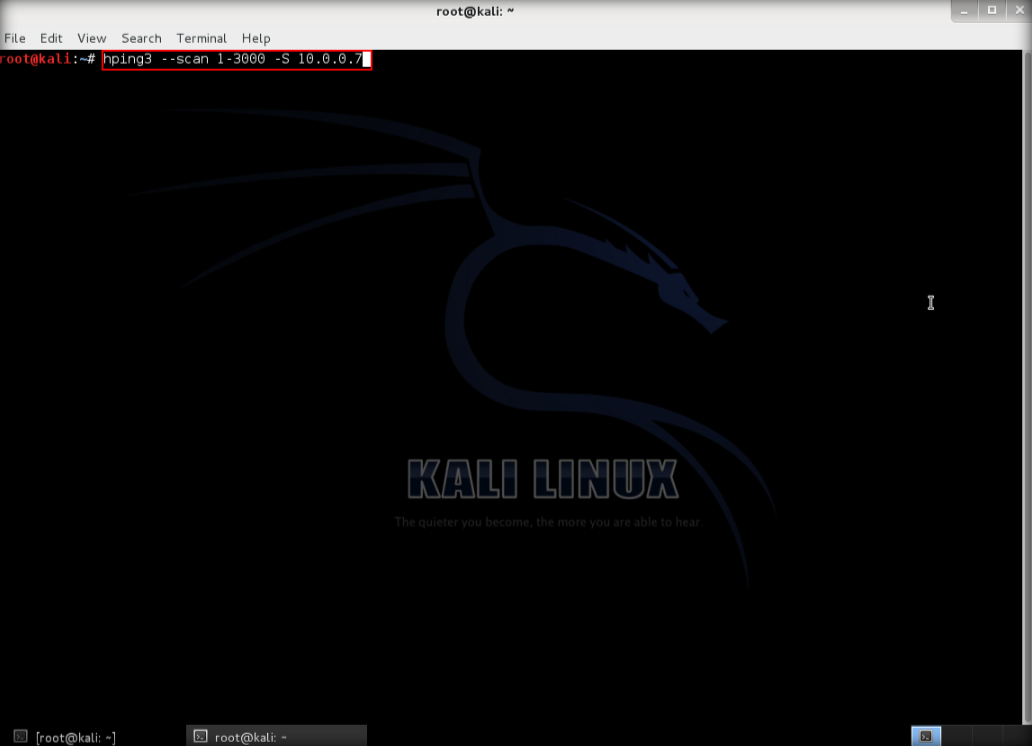
5. The output indicates the open ports from the IP target.

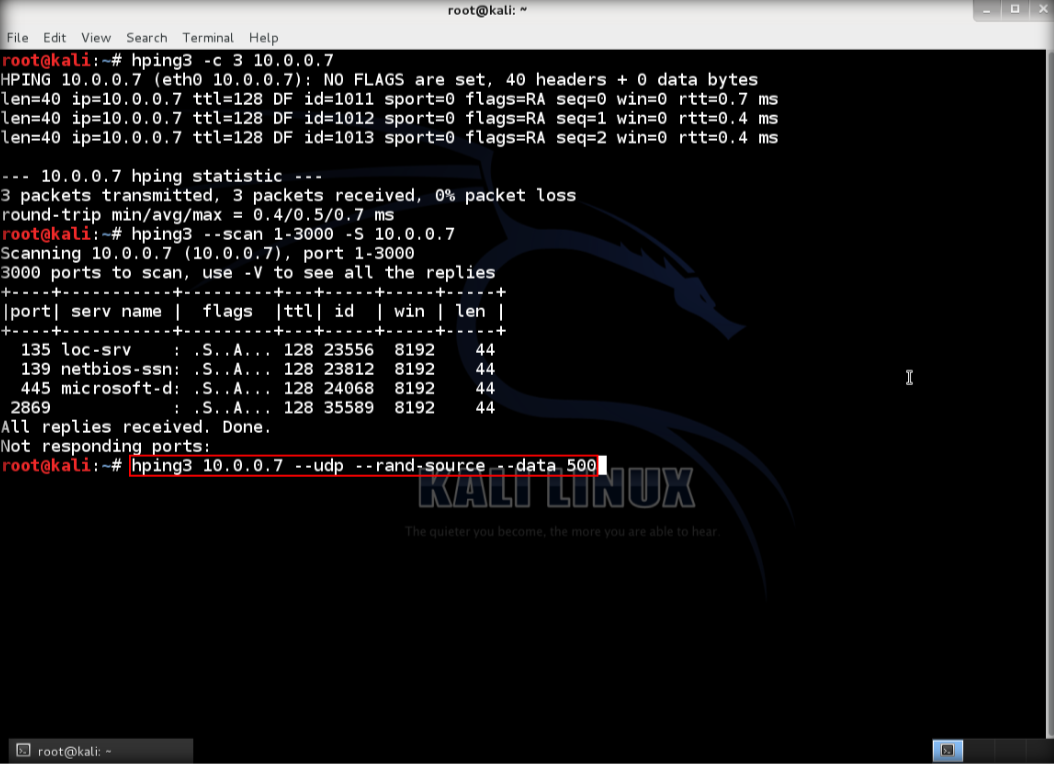
6. Then, use UDP packet crafting, type hping3 <IP address of target> –udp –rand-source –data 500, then enter. This condition, target is running windows 8.1

    7. Open the windows 8.1 and launch wireshark to observe UDP  packets

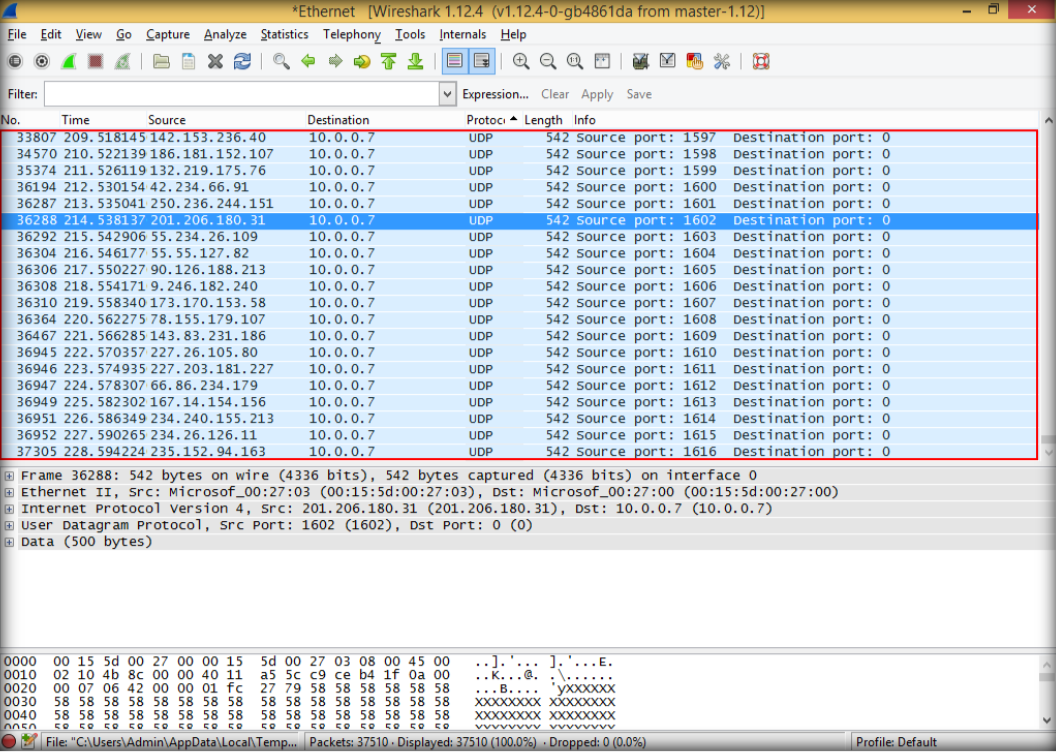
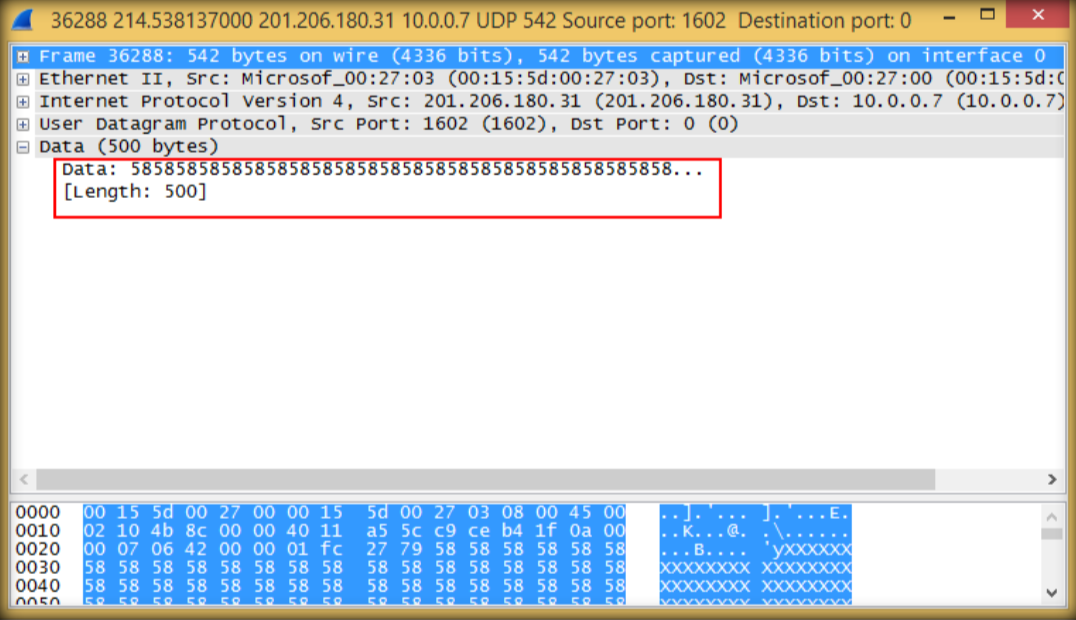
    8. Double click to see details, then close wireshark windows and quit without saving.

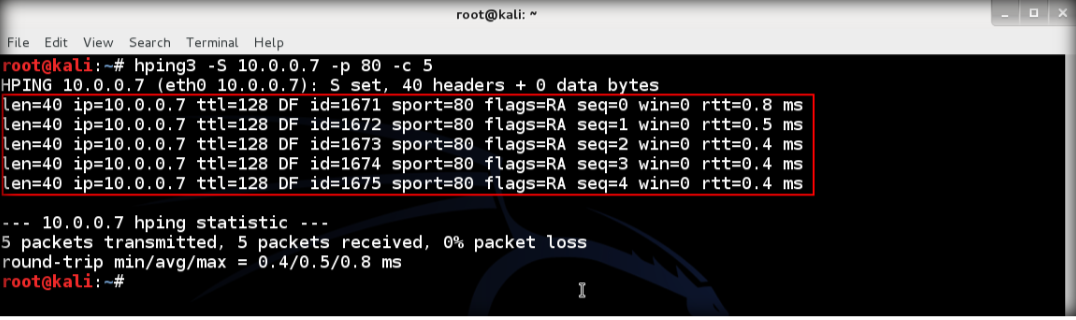
9. Launch  wireshark again and leave it running behind, after that send TCP SYN to the target. Type hping3 -S <IP Address of target> -p 80 -c 5 then enter

10. The output shows that TCP packets sent through port 80 to the target

11. Open wireshark again to observe TCP packets captured by wireshark, restart to start new capture

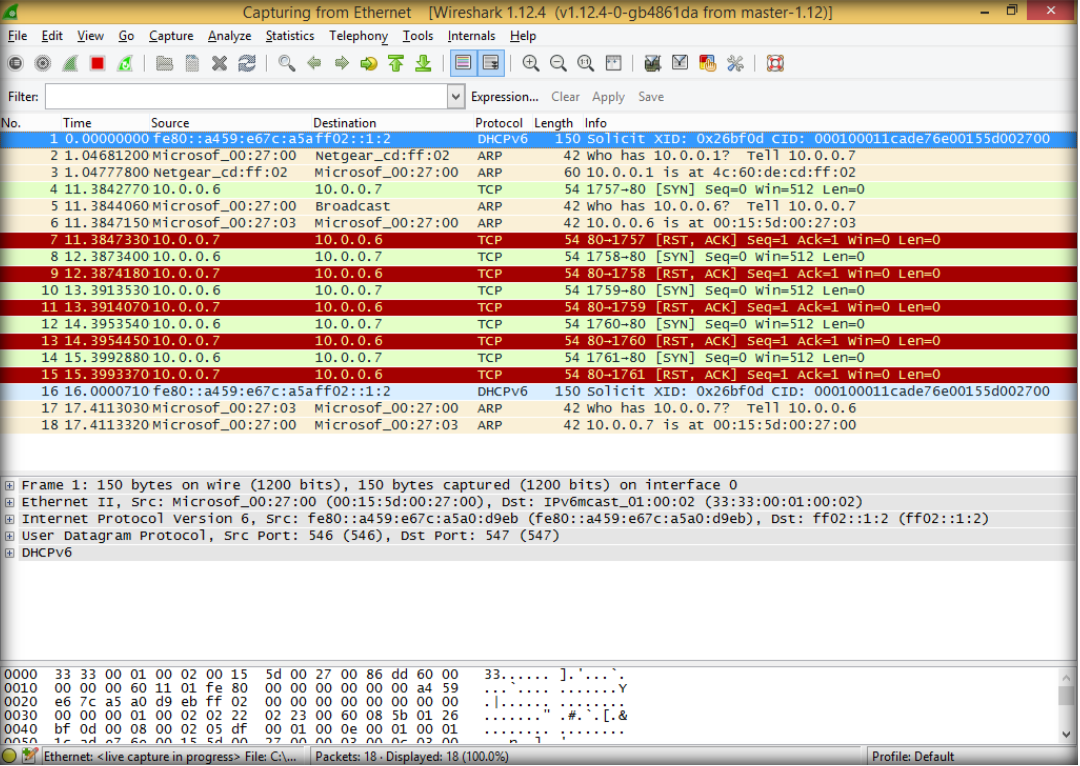
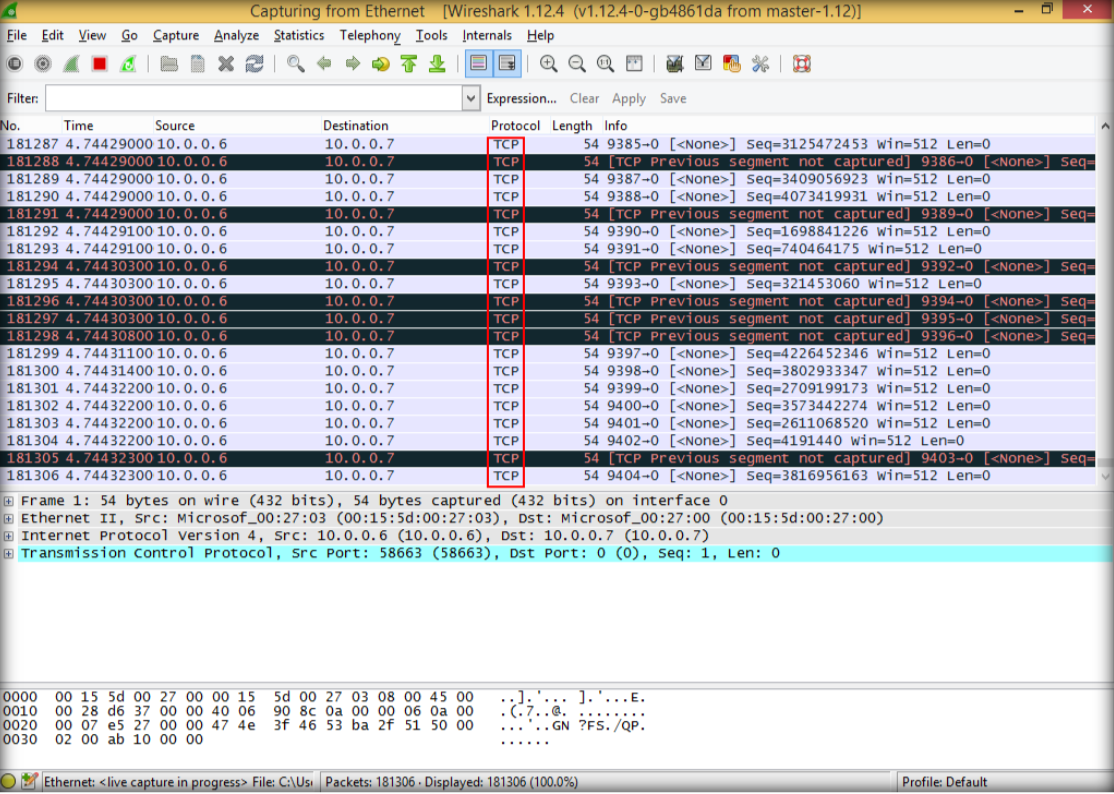
12. Back to Kali again, flood the TCP packets to target. Type hping3 <IP address target> –flood then enter

13. After floods to the target, it will respond in terminal

14. Switch back to wireshark, and see how the TCP packets flooding from the attacker

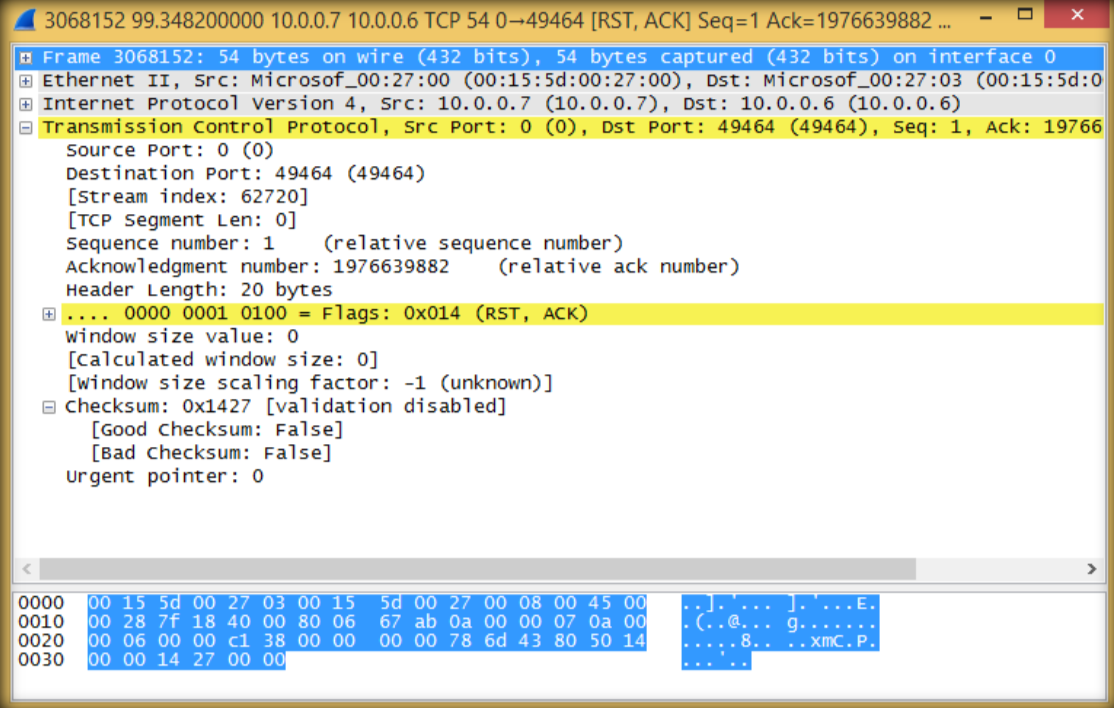
15. Double click to see more detail information regarding TCP packets sent from attacker to target

Posted by :

Bonfilio Aldrino Sugiarto – CS2020 – 2001611794

Kali Linux Installation

Filed in Uncategorized

Step :

  1. Download Kali Linux at https://www.kali.org/downloads/ , download the 64 bit or 32 bit depending on the system, locate the download folder and then open VirtualBox

2. Launch VirtualBox and create VirtualMachine. Enter a name for the Virtual Machine for example ‘ Kali Linux ‘,  then click next.

3. Specify RAM size for this virtual machine, where 1 GB of RAM is 1024, so just multiply it with how many memory of RAM you want.

4. Create virtual hard drive, then click create.

5. Choose hardisk file type, choose the default one and then click next.

6. Choose Dynamically Allocated at ‘ Storage on physical hard ‘ disk page

7. Specify the disk capacity and the folder location to save file from Kali Linux. 60 GB on the hardisk will be good. After that click create.

8. The virtual machine created and will show like this

9. Click on the start icon and will start the virtual machine then the installation process will begin. After that select graphical install from boot menu, select the very top one and press enter.

10. After that, language box selection is shown and choose the language that suits you. Then, choose the location as well and then click next.

11. After done with some basic dialog box, installation process will start soon.

12. After that you will need to enter the hostname for your system, then click continue.

13. Then, fill the domain name for your system. After that click continue

14. Set a password for the root user account, then click continue

15. Also, set a username for the acount. Then continue

16. This time, set password for the user account, continue

17. Next dialog box will set up the partition of your disk. Select default one, use entire disk then continue

18. Select a disk partition, where it should be only one option, press continue

19. After that, select the partition scheme by choosing all files in one partition which is recommended for new user

20. Next step will be the summary of the disk partition, make sure the summary is set as you want then finish partitioning and write changes to disk

21. After that, you will be asked to confirm write changes to disk. Select yes and click continue to proceed the next step

22. Installation will start soon after that, configure the package manager dialog will show up and asked whether you wish to configure network mirror for Package manager. Choose yes by default and continue

23. This section will ask HTTP proxy, leave it blank and continue

24. Install GRUB boot loader , select yes and continue

25. Installation complete, continue the proccess and the the VM will reboot.

26. After the VM reboot, enter username or root user along with the password, after that you will see the desktop of Kali Linux

Posted by :

Bonfilio Aldrino Sugiarto – CS2020 – 2001611794

Exploring a Network Using Nmap

Filed in Uncategorized

Step :

  1. Launch Kali Linux

2. Search in application named ‘ Nmap Zenmap ‘

3. Nmap – Zenmap window GUI appears

4. Fill the IP target, choose Intense Scan and press the Scan button then nmap will start scanning the IP

5. Nmap shows the result of the scanning

6. Click the Ports / Hosts tab to show more information

7. Click the Topology tab to view Nmap’s topology for the provided IP address in the Intense scan Profile.

8. Click the Host Details tab to see details of all hosts discovered

9. Click on the Scans tab to see scan detail for the IP

10. Xmas scan sends a TCP frame to a remote device with URG, ACK, RST, SYN, and FIN flags set. To perform a Xmas scan, create a New Profile

11. Select the Profile tab and fill the name with Xmas Scan

12. Click the Scan tab and select Xmas Tree scan (־sX) from the TCP scans drop-down list. Save Changes when its done

13. Change the Profile to Xmas Scan and start scanning

14. Nmap scans the target and shows on the Nmap Output

15. Null scan works only if the operating system’s T C P /IP implementation is developed according to RFC 793.In a null scan, attackers send a TCP frame to a remote host with no Flags. To do the Null Scan, do the same thing before by creating a New Profile and fill Null Scan in the profile name

16. Click on the Scan Tab then change the TCP Scan dropdown to Null Scan (-sN), and then save changes

17. Perform the Null Scan by changing the profile and start the scan

18. Nmap scans target and display result in Nmap Output

19. Click the Host Details tab to view the details of hosts, such as Host Status, Addresses. Open Ports, and Closed Ports

20. Attackers send an ACK probe packet with a random sequence number. No response means the port is filtered and an RST response means the port is not filtered. To perform ACK Flag Scan, create new profile. Fill the profile name with ACK Flag Scan.

21. Click the Scans tab and change the TCP dropdown to ACK scan

22. Click the Ping tab and check the IPProto Probes (-PO) then save changes

23. Start perfoming the ACK Flag Scan by changing the profile and then start the scan and here the result is shown by Nmap in Output tab.

24. Click the Hosts tab to show more information regarding the hosts

Posted by :

Bonfilio Aldrino Sugiarto – CS2020 – 2001611794