Step :
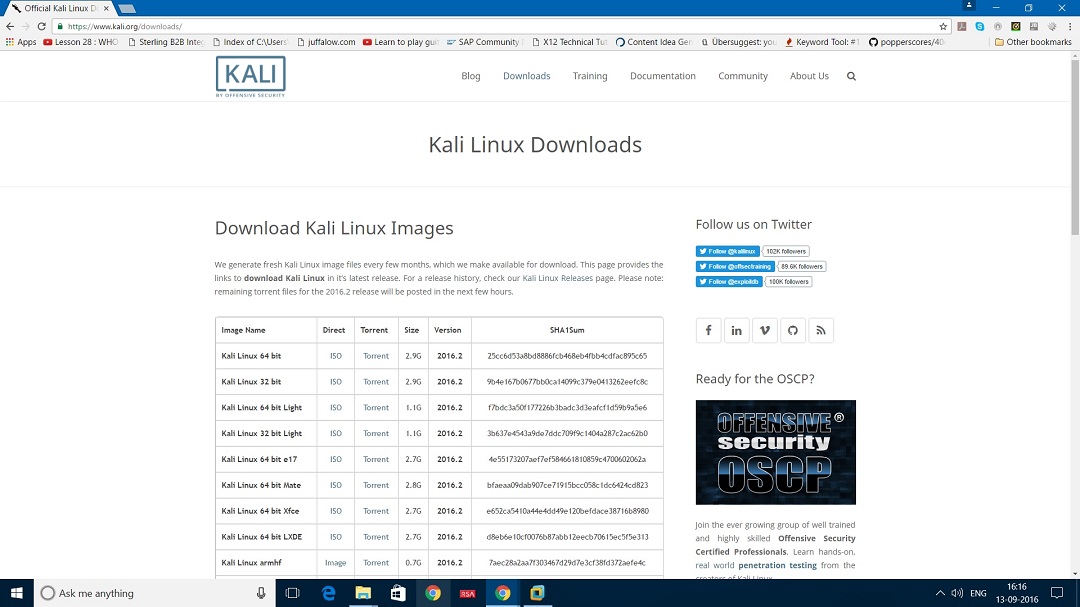
- Download Kali Linux at https://www.kali.org/downloads/ , download the 64 bit or 32 bit depending on the system, locate the download folder and then open VirtualBox
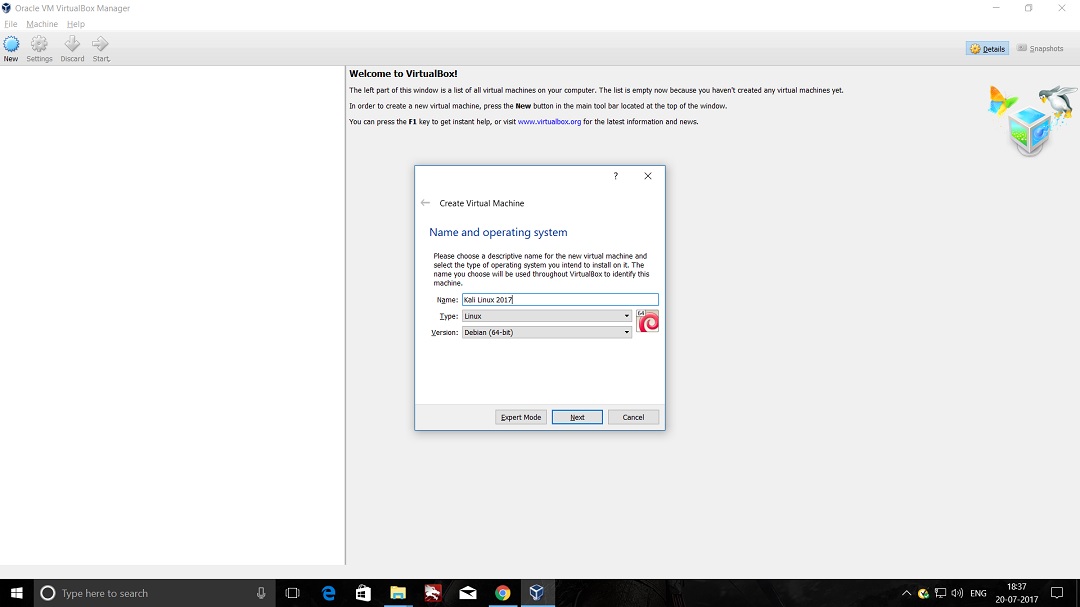
2. Launch VirtualBox and create VirtualMachine. Enter a name for the Virtual Machine for example ‘ Kali Linux ‘, then click next.
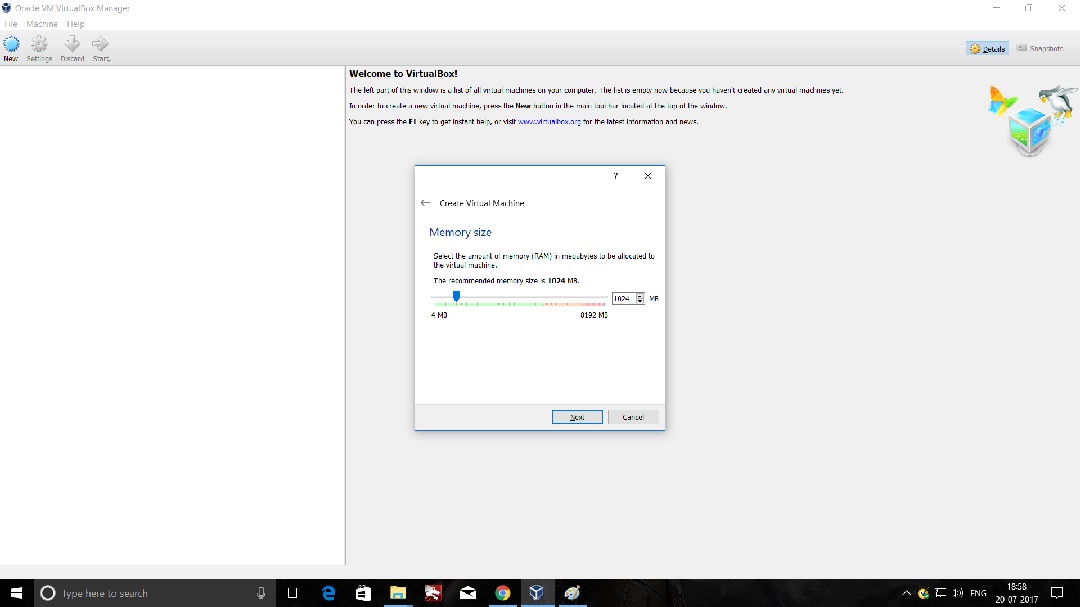
3. Specify RAM size for this virtual machine, where 1 GB of RAM is 1024, so just multiply it with how many memory of RAM you want.
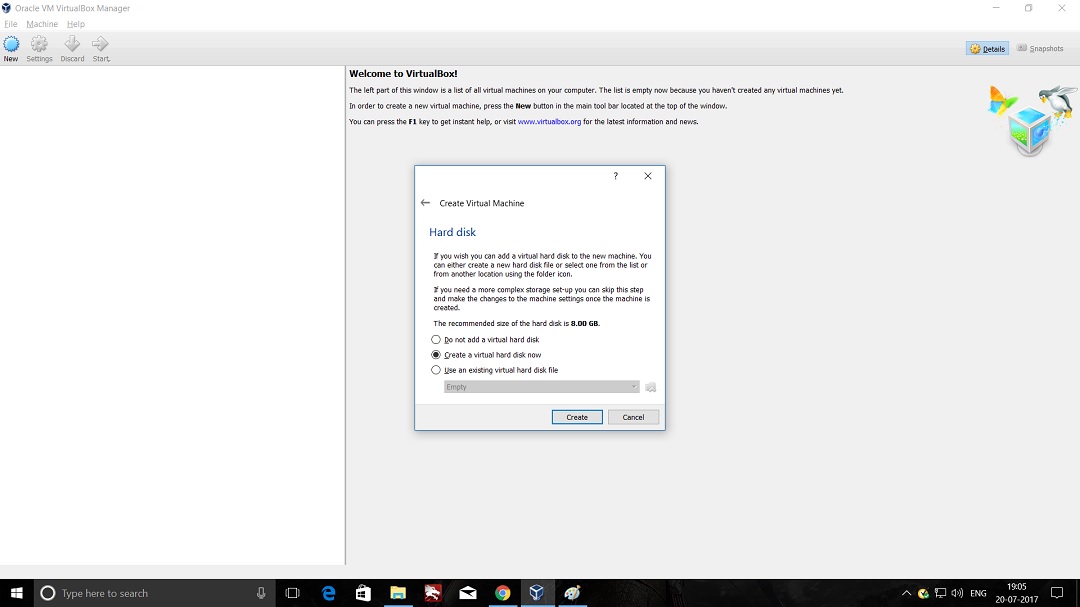
4. Create virtual hard drive, then click create.
5. Choose hardisk file type, choose the default one and then click next.

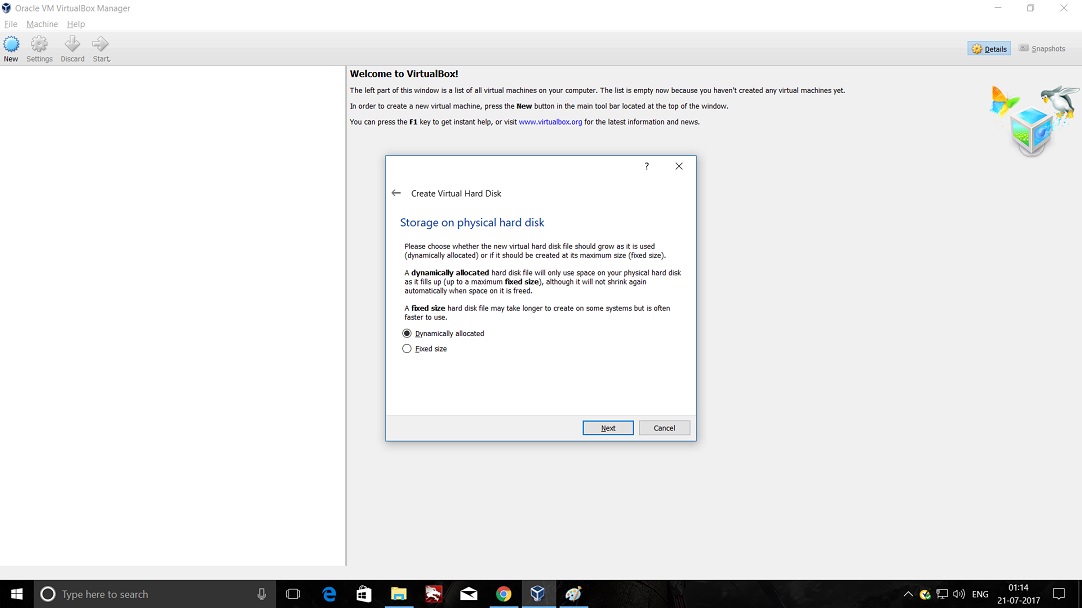
6. Choose Dynamically Allocated at ‘ Storage on physical hard ‘ disk page
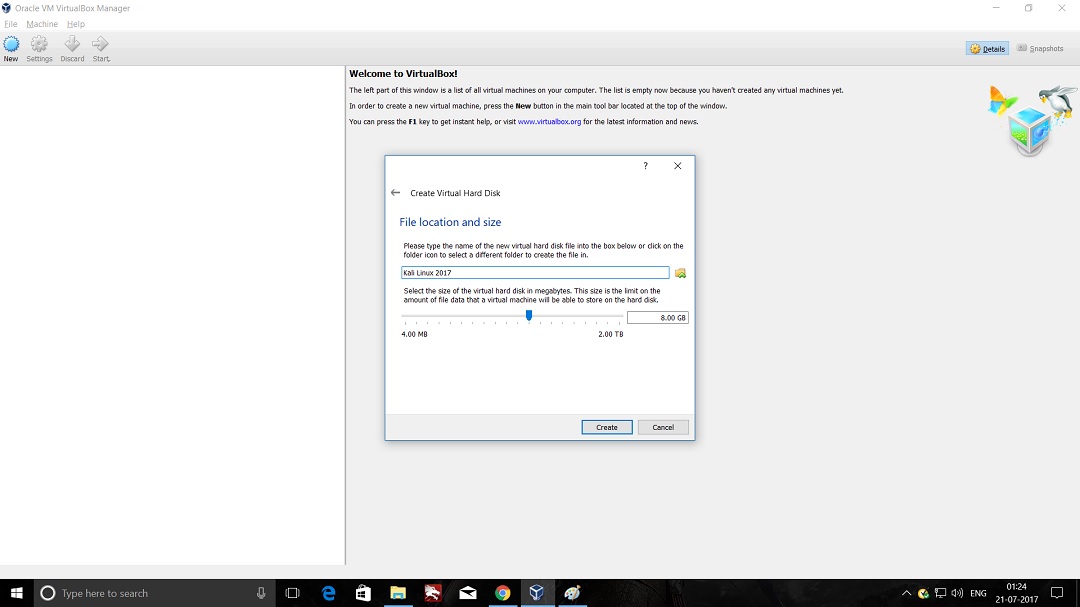
7. Specify the disk capacity and the folder location to save file from Kali Linux. 60 GB on the hardisk will be good. After that click create.
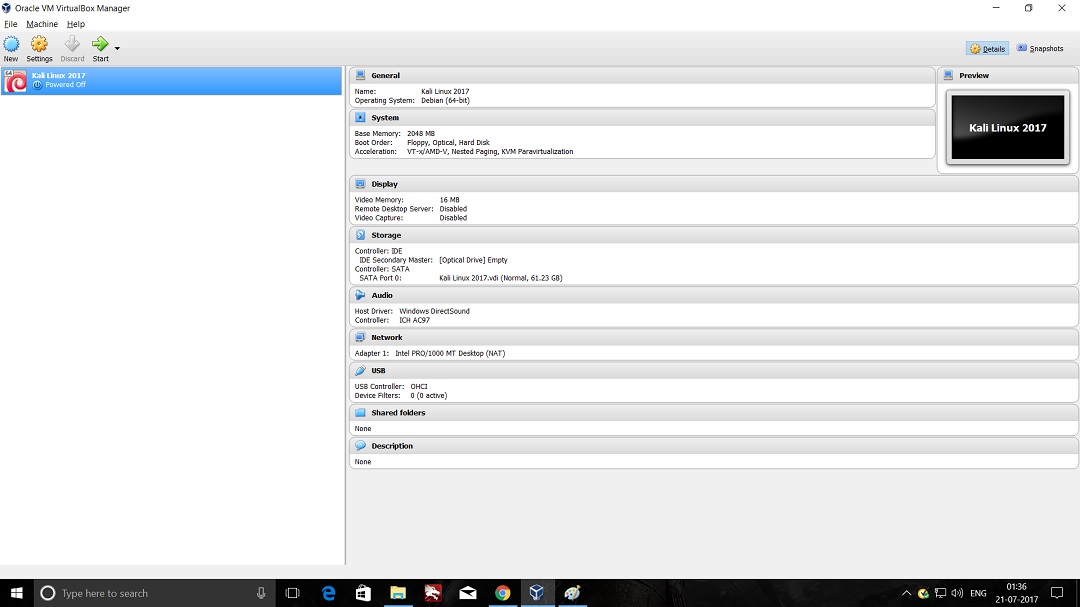
8. The virtual machine created and will show like this
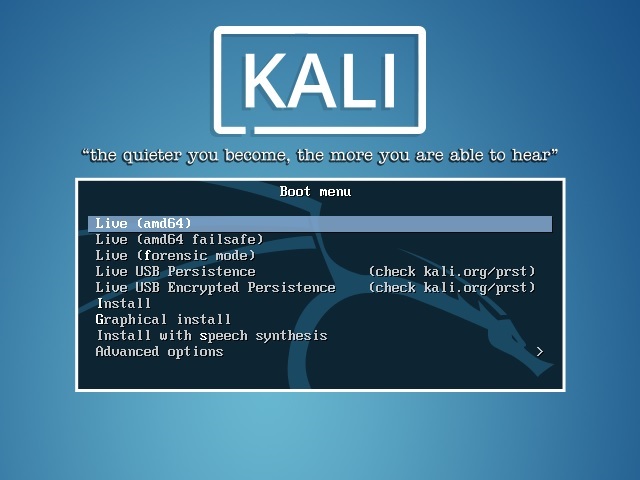
9. Click on the start icon and will start the virtual machine then the installation process will begin. After that select graphical install from boot menu, select the very top one and press enter.
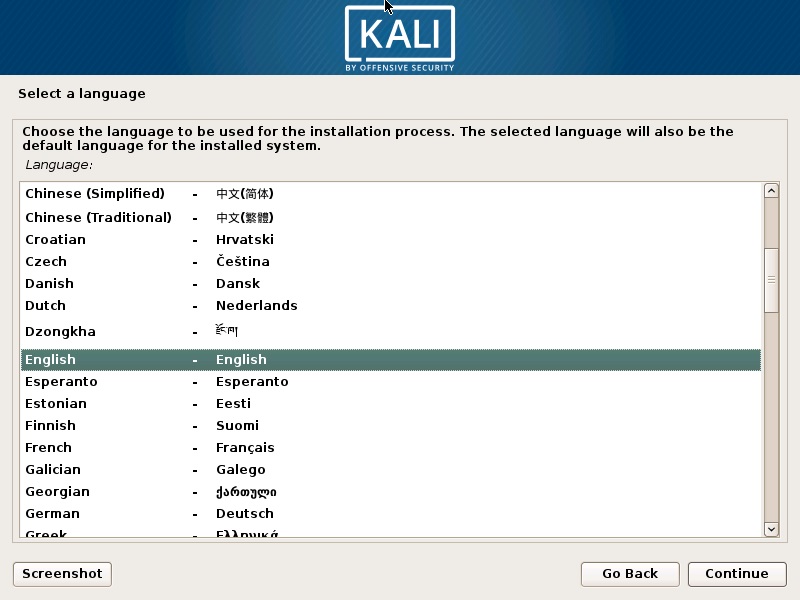
10. After that, language box selection is shown and choose the language that suits you. Then, choose the location as well and then click next.
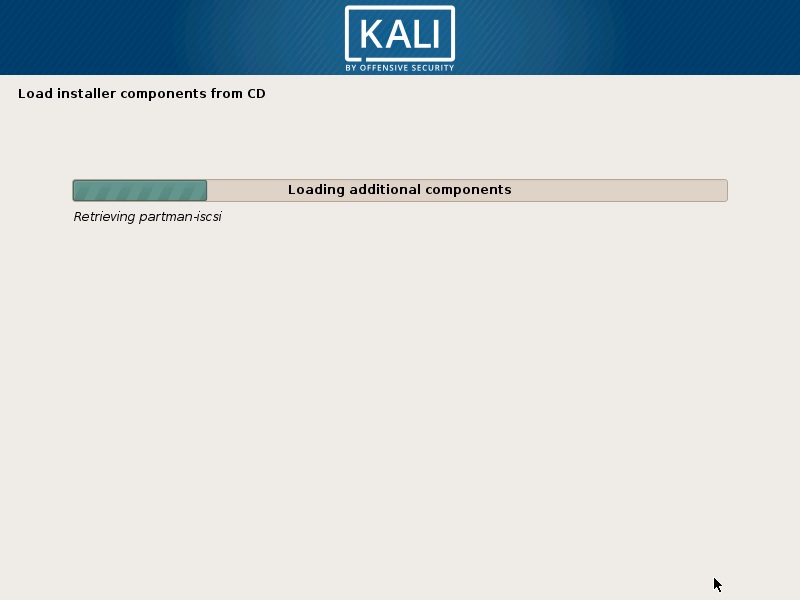
11. After done with some basic dialog box, installation process will start soon.
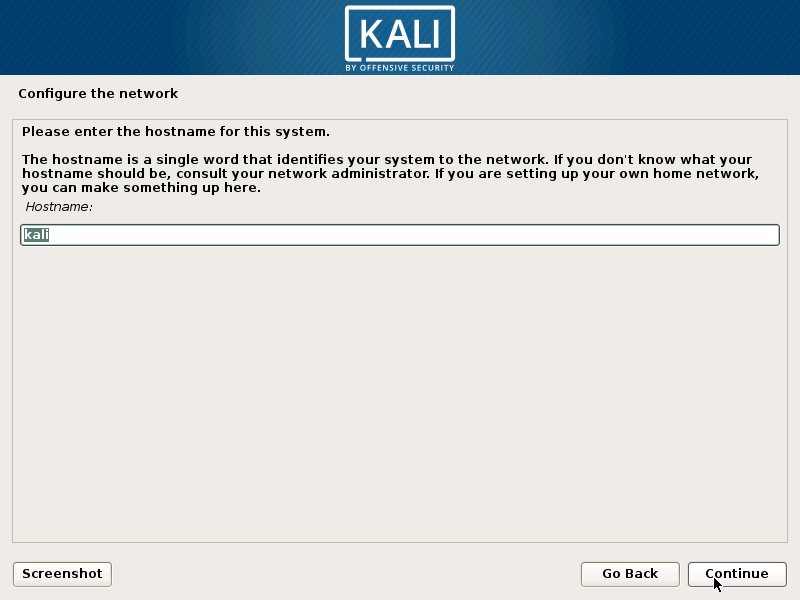
12. After that you will need to enter the hostname for your system, then click continue.
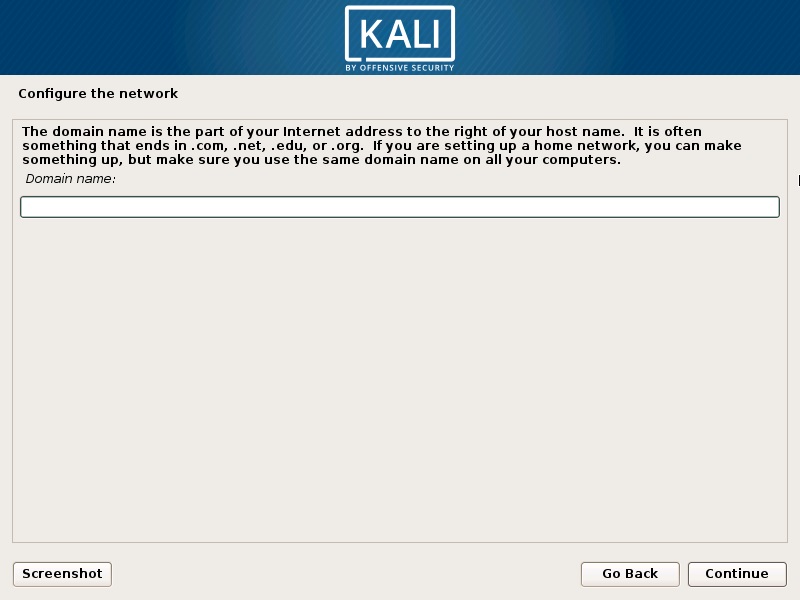
13. Then, fill the domain name for your system. After that click continue
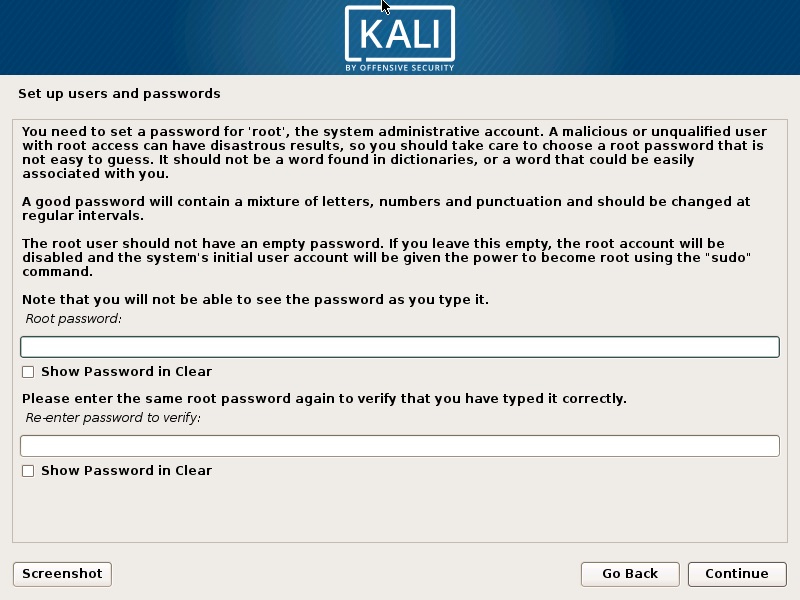
14. Set a password for the root user account, then click continue
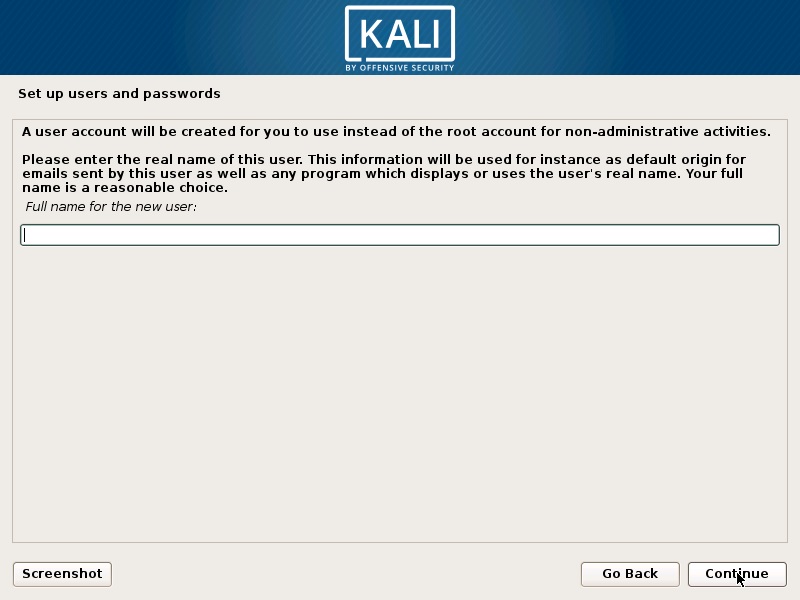
15. Also, set a username for the acount. Then continue
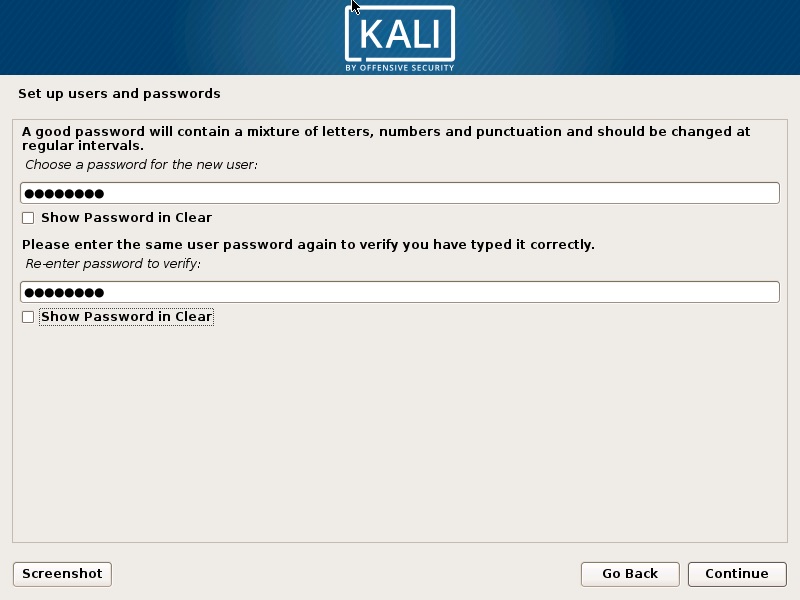
16. This time, set password for the user account, continue
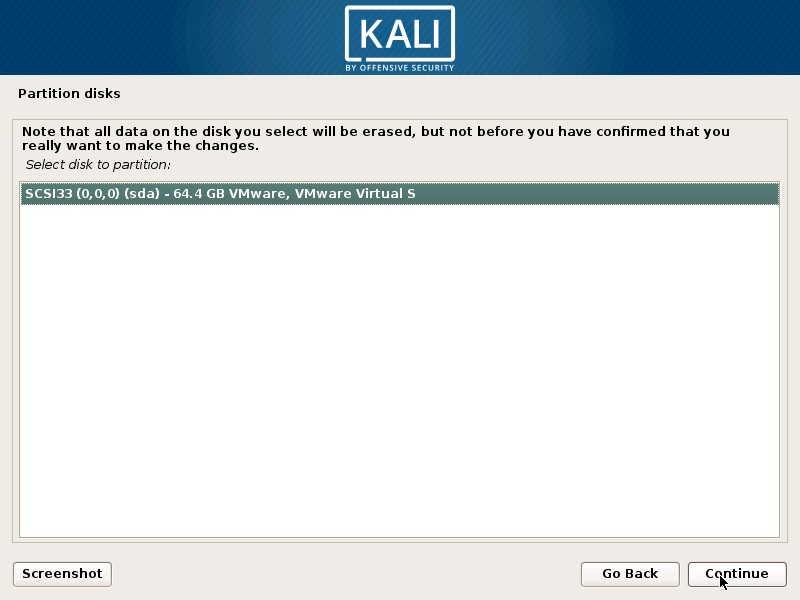
17. Next dialog box will set up the partition of your disk. Select default one, use entire disk then continue

18. Select a disk partition, where it should be only one option, press continue
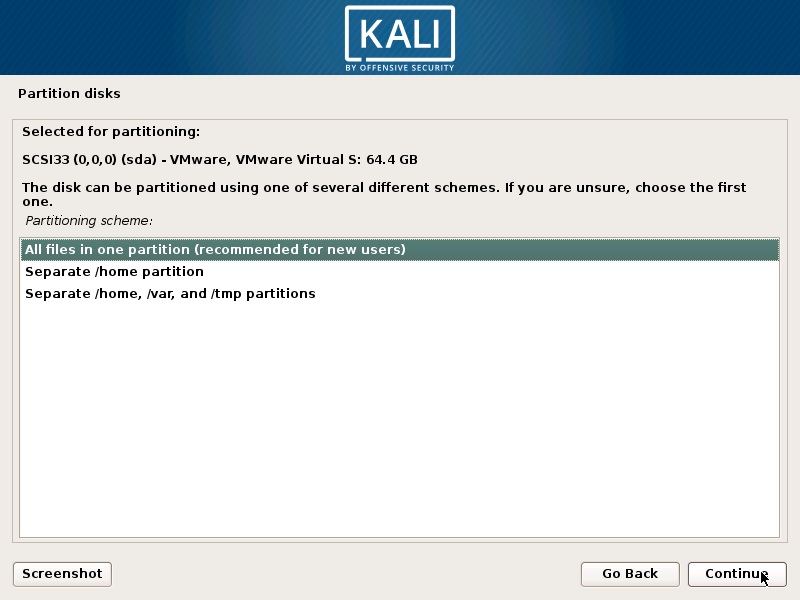
19. After that, select the partition scheme by choosing all files in one partition which is recommended for new user
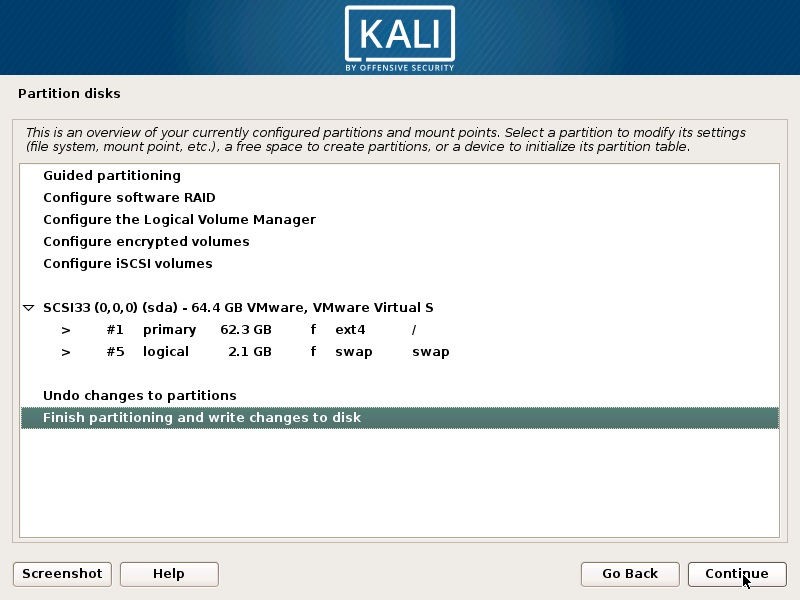
20. Next step will be the summary of the disk partition, make sure the summary is set as you want then finish partitioning and write changes to disk
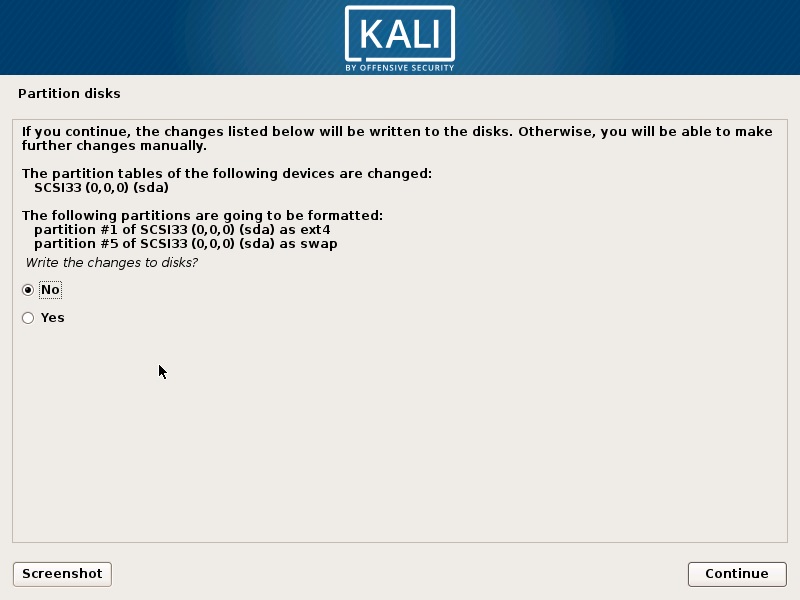
21. After that, you will be asked to confirm write changes to disk. Select yes and click continue to proceed the next step
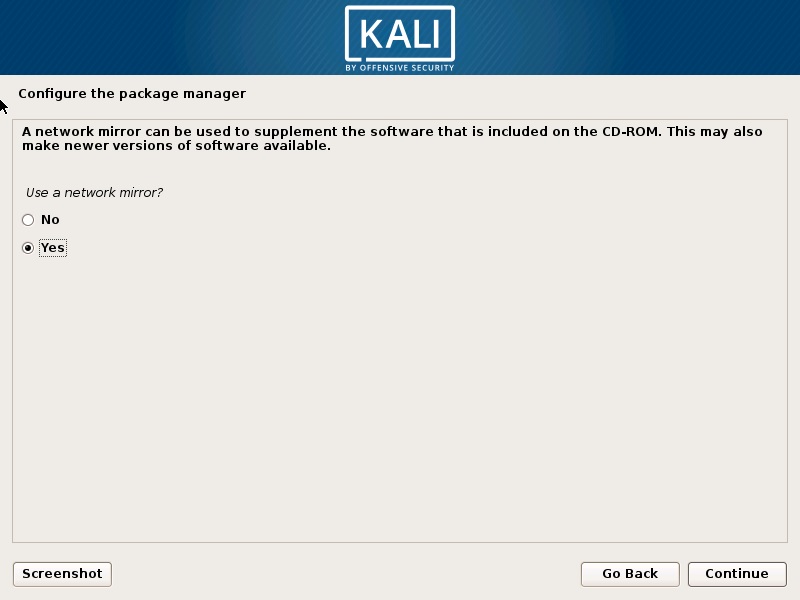
22. Installation will start soon after that, configure the package manager dialog will show up and asked whether you wish to configure network mirror for Package manager. Choose yes by default and continue
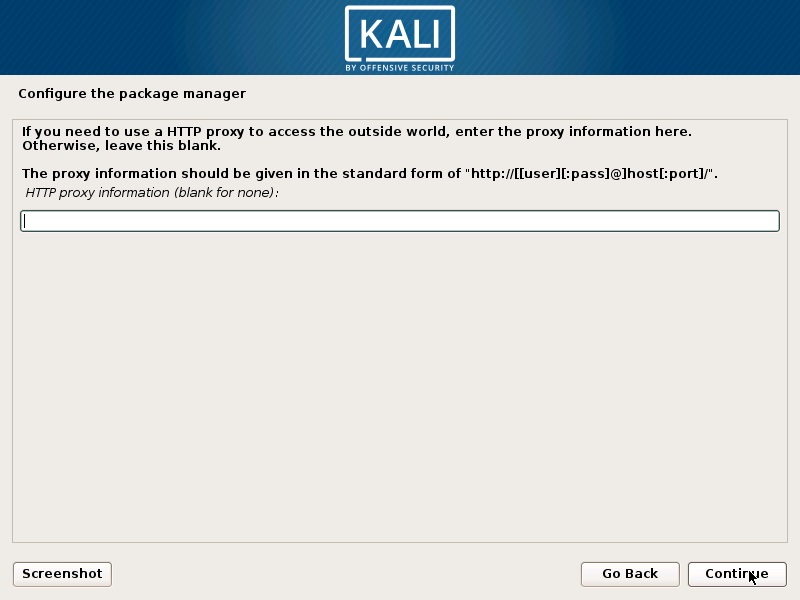
23. This section will ask HTTP proxy, leave it blank and continue
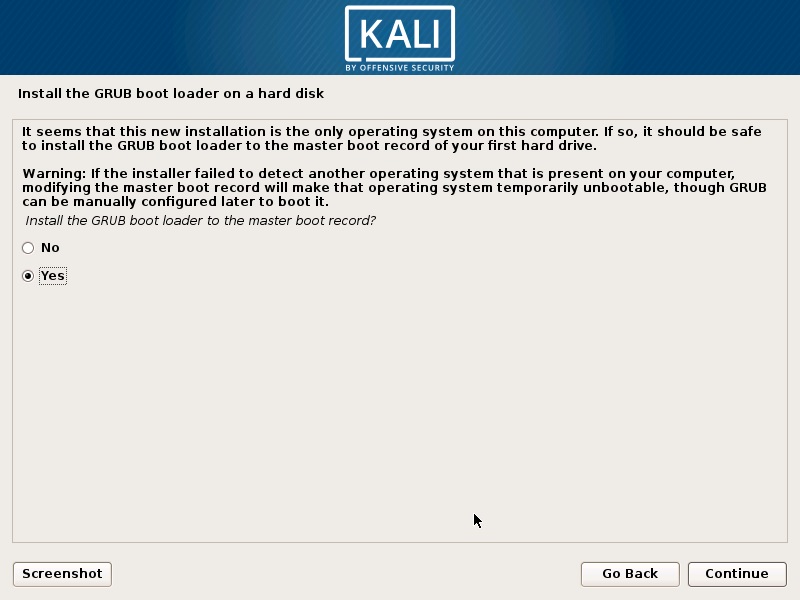
24. Install GRUB boot loader , select yes and continue
25. Installation complete, continue the proccess and the the VM will reboot.

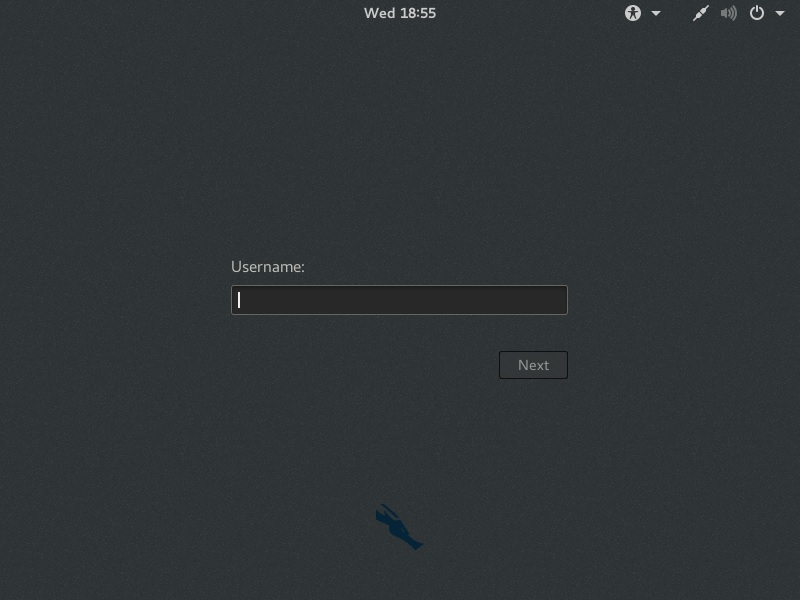
26. After the VM reboot, enter username or root user along with the password, after that you will see the desktop of Kali Linux

Posted by :
Bonfilio Aldrino Sugiarto – CS2020 – 2001611794